
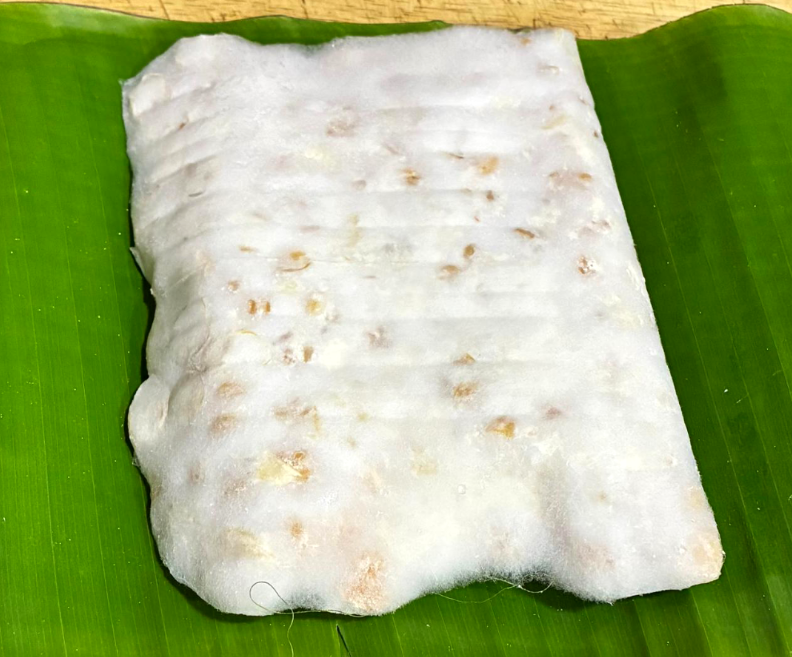
Featured image: Chickpea tempeh, made by Uma from the Homemade Tempeh Group
Interested in making your own soy and/or non-soy tempeh at home? Join my free WhatsApp group Homemade Tempeh (Recipes, Tips, & More)!
Making different versions of your own soy and non-soy tempeh at home is a fun culinary adventure! However, for those new to this journey, it may feel a bit challenging or even intimidating. And that is perfectly OK! If someone had told me even six months ago that one day I would be making my own tempeh at home–and that too, different varieties–I wouldn’t have believed them, and yet, here I am 🙂
Read this blog before you start making your own tempeh at home: Homemade Tempeh: Tips for Beginners
In today’s post, I will explain in detail how to tell if your homemade tempeh is ready to harvest and whether any contamination has occurred.
Signs your Tempeh is Ready for Harvest (and Safe to Eat!)
1. Appearance
The tempeh inside the ziplock bag/perforated container should look fully white or mostly white with tiny specks of the beans visible.
2. Touch
The tempeh is ready for harvest when the beans are bound together by thick, white fuzz (mycelium) and has taken the form of a firm and solid block. It may feel slightly warm to the touch.
3. Smell
When it is ready to be harvested, the tempeh has a mild beany, lightly fermented aroma, like that of idli batter. This smell can also be described as “earthy,” “slightly sweet,” or “mushroomy.”
4. Safe Colour Variations
A perfect block of tempeh has only bright white mycelium growth. However, a few scattered gray or black spots are considered normal at the time of harvest (these are just overripe spores, nothing to worry about).
So, these are the basic guidelines to keep in mind while harvesting your homemade tempeh.
Also read: Homemade Tempeh: Tips for Beginners
Now I am going to share a few images of high-quality, freshly harvested homemade tempeh, both soy and non-soy variants, to give you a better idea.
A big thanks to Uma and Akanksha from the Homemade Tempeh Group on WhatsApp for graciously sharing pictures of different varieties of tempeh from their kitchen!
Image 1: Soy tempeh, ziplock bag
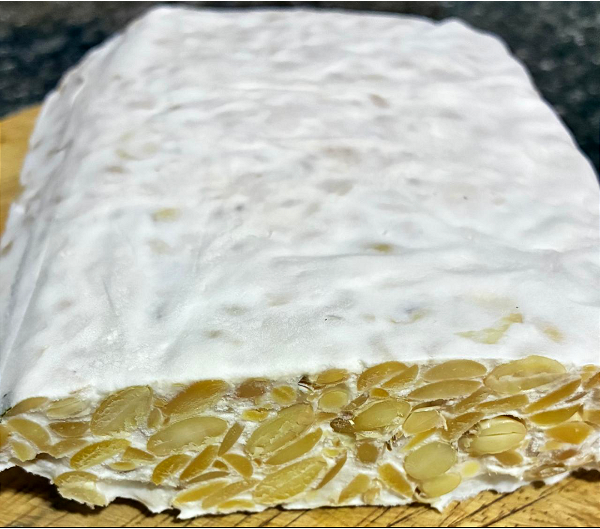
Image 2: Soy tempeh, banana leaf package
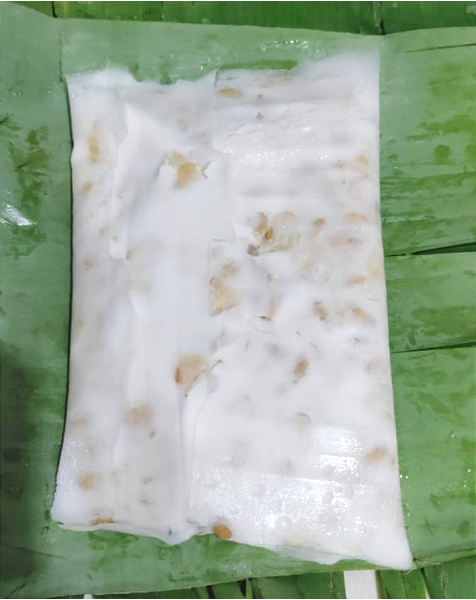
Image 3: Rajma tempeh, perforated container (tofu press)
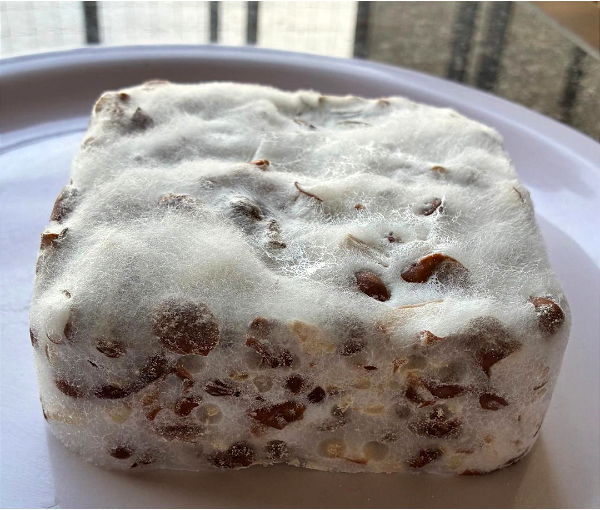
Image 4: Chickpea tempeh, ziplock bag
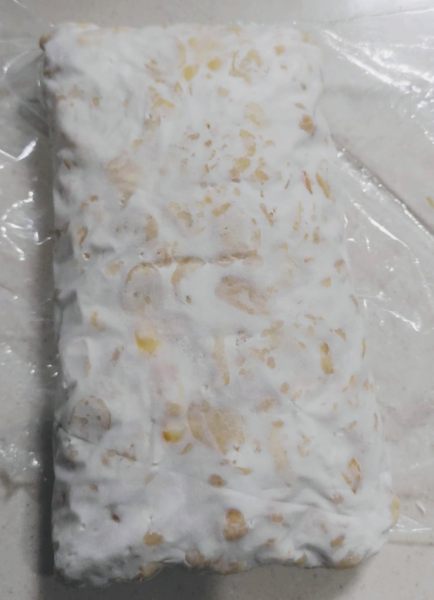
Image 5: Red lobia tempeh, ziplock bag
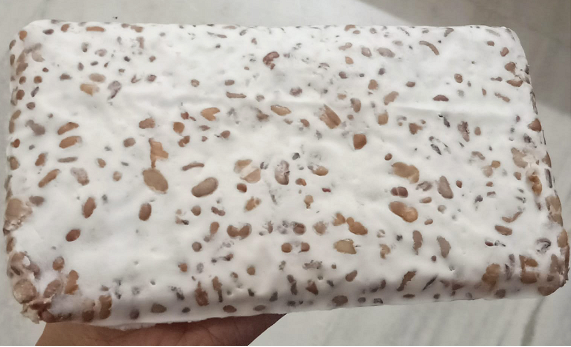
Image 6: Black chickpea tempeh, ziplock bag
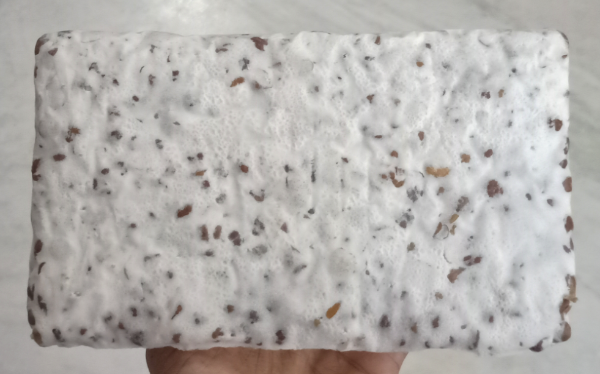
Signs of Contamination: When to Discard the Tempeh?
1. Presence of Colorful Molds
If there is any presence of green, blue, pink, or orange mold, it means the tempeh has been contaminated with toxic microbes and should be discarded immediately.
2. Crumbly and/or Slimy Texture
If the beans are crumbly, mushy, falling apart, and/or slimy, it means the tempeh is spoiled. Throw it away.
3. Unpleasant Smell
If the tempeh smells unpleasant and rotten, it is time to discard it. A strong, sharp smell of ammonia and/or alcohol is also a sign that the tempeh is no longer fit for consumption.
And now I am going to show you a few images of homemade tempeh that have been contaminated to help you understand better. Much thanks to the members of the Homemade Tempeh Group for sharing these “contam” images to help others.
Image 1 + notes: Failed attempt to grow tempeh in a container. Probable reason: Growing tempeh in open trays has a higher risk of contamination due to exposure to the elements. Solution? It is safer to grow tempeh in ziplock bags. Or take proper precautions to manage the environmental factors if growing tempeh in open containers.

Image 2 + notes: Tempeh in a ziplock bag with signs of contamination. Probable reason: excess surface moisture on the beans at the time of inoculation. Solution? It is important to ensure that the beans are 100% dry to the touch while inoculating.
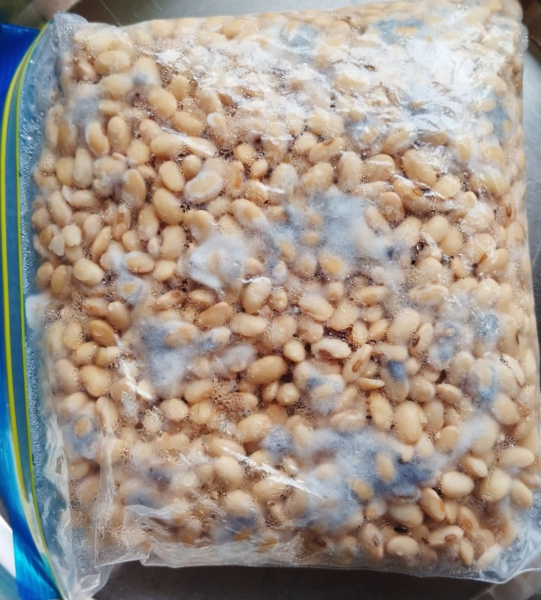
Image 3 + notes: Usage of contaminated homemade starter culture to inoculate cooked red lentils. Probable reason: the raw material for the starter got exposed to unfavorable microbes in a damp environment. Solution? The raw material should be processed in a dry and well-ventilated area while making your own tempeh starter culture at home.
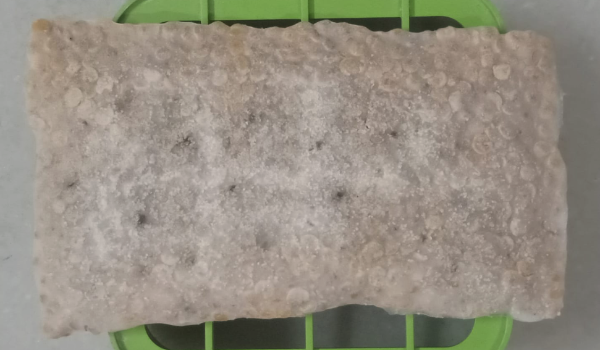
Image 4: Soy okara tempeh with signs of contamination. Probable reason: the okara had a high moisture content at the time of inoculation. Solution? The okara should be properly dehydrated before inoculation.
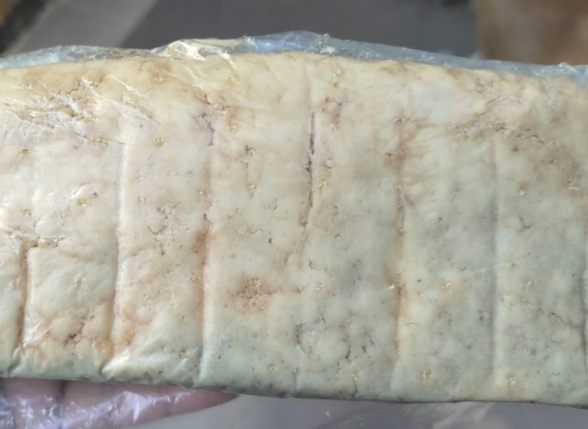
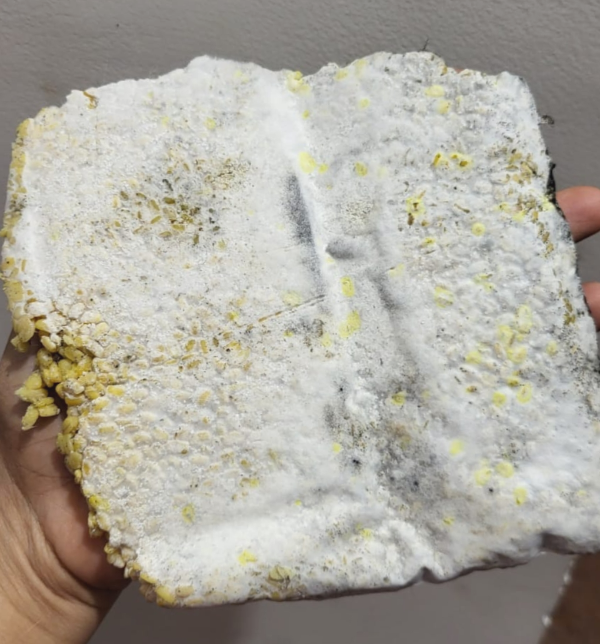
Image 6 + Notes: Yellow moong dal tempeh with signs of contamination (see the bright yellow spots?) Probable reasons: presence of excess moisture in the cooked dal and/or exposure to “bad” microbes during the drying process. Solution? The cooked dal/beans should be dried properly before inoculation. Use vinegar to discourage the growth of “bad” microbes.
Also see:
Homemade Tempeh: Tips for Beginners
How to Make Homemade Tempeh Starter?
11 Varieties of Soy & Non-Soy Tempeh to Make at Home
11 Exciting Ideas to Use Tempeh in Indian Cuisine
Thanks Namrata for all the guidance and hand holding you gave me in learning how to make tempeh from scratch at home.
I was really inspired by your posts to start the journey of makingTEMPU – as we lovingly call it in our group😀
Though I was skeptical in the beginning, I am glad I took the plunge. I am throughly enjoying and experimenting 😀
May you continue to inspire us !
Let’s keep the momentum going.
Loads of love and thanks a ton❤️
Thank you, Uma, for sharing your experience & images for this post 🙂
I’m so happy that we are on this “Tempu making” journey together! Your presence in the group is so inspiring to me and others.
Thanks 🙏
[…] Also see: How to Know if My Homemade Tempeh is Ready? […]
[…] Also see: How to Know if My Homemade Tempeh is Ready? […]
[…] Also see: How to Know if My Homemade Tempeh is Ready? […]
[…] Also see: How to Know if My Homemade Tempeh is Ready? […]
[…] How to Know if My Homemade Tempeh is Ready? […]
[…] How to Know if My Homemade Tempeh is Ready? […]
[…] How to Know if My Homemade Tempeh is Ready? […]
[…] How to Know if My Homemade Tempeh is Ready? […]
[…] How to Know if My Homemade Tempeh is Ready? […]
WOW, just bumped on this page and was delighted to find so many colorful photos of contaminated tempehs. That’s a rare collection! (Can I say, keep it up? 😜) Honestly, thanks for preserving all this photos. For long, I’ve always heard the description of colours like blue, pink, green, yellow which were difficult to imagine for me. I thought these are perhaps cases from some foreign weather & environments and not from our counrtry. At best, I could imagine that colours like pale or light green are possible but never expected them to be this vibrant. (BTW, what’s wrong with… Read more »
Hey Ashutosh 🙂 Nice to see another tempeh paglu — you seem to be one from this message lol Ha ha I know right, even I wasn’t aware contam could be of different vibrant colors! All of these contam pics aren’t mine. I collected them from my Homemade Tempeh WhatsApp group (link is in the post if you wish to join). Thanks to the members for letting me post them! Pic 3 is mine only, I grew it with a contaminated homemade starter ha ha…. It was stinking to hell. I live in India (already hot enough in summers), and… Read more »