
Interested in making your own soy and/or non-soy tempeh at home? Join my free WhatsApp group Homemade Tempeh (Recipes, Tips, & More)!
I have been making my own Vegan Curd Starter at home for years now. The process is quite simple and involves harvesting wild strains of lactobacillus bacteria from the environment. You can check it out here: 5+ Types of Vegan Curd Starters.
Now, before I started making tempeh at home using a commercial starter culture, I wondered if it was possible to make tempeh starter culture at home as well. Of course, initially I was hoping it would be possible to gather the spores of Rhizopus oligosporus– the edible fungus responsible for tempeh production–from natural sources. However, I learned that this fungus can be found naturally only in certain plants native to Indonesia, such as teak and sea hibiscus. Since these specific plants aren’t easily found in India, we need to buy commercial tempeh starter culture to begin our tempeh-making journey at home. But here is the good news… Once you start growing your own tempeh at home, you can harvest the live Rhizopus oligosporus spores from your fresh tempeh to create a starter culture.
Read this post for clarity before you start making your own tempeh:
Homemade Tempeh: Tips for Beginners
So, the process goes like this… First you buy commercial tempeh starter culture. Then you start growing your own tempeh at home. Once you start making good-quality homemade soy tempeh, you can harvest live Rhizopus oligosporus spores from it to create a starter culture for future use.
I know what you are thinking…
Yes, you need fresh, homemade tempeh for this process.
No, you can’t use store-bought tempeh brands as these are already pasteurized and don’t contain any live spores.
In this post, I will share a very easy way of making a small quantity of your own tempeh starter culture at home. You can always make a bigger batch once you learn the proper process. This method is beginner-friendly. If you know the basics of growing soy tempeh at home, you can make this starter. But yes, you should already be good at making soy tempeh for this to work successfully because homemade soy tempeh is the raw material we will be working with 🙂
Homemade Tempeh Starter Culture (Beginner Friendly)
Time taken: 24 to 30 hours incubation + 48 to 60 hours drying time + 10 minutes active work
Raw materials
* Homemade soy tempeh, freshly harvested
* White rice (as required)
Method
1. Cut off a small piece (around 30-40 gms) from a freshly harvested block of soy tempeh. Let it incubate for several more hours for the spores to mature. This will take 24 to 30 hours in Indian summer. It may take longer in winter.
2. The surface of the tempeh piece will become greyish with a few black spots. This is a good sign that the tempeh spores are maturing.
3. Thinly slice/crumble the over-mature tempeh into tiny bits and keep to air-dry under a fan. This may take between 48 and 60 hours in Indian summer. You may sun-dry in winter.
4. Once the tempeh pieces are 100% dry, roughly measure their volume using a tablespoon. In a separate bowl, take three times that amount of white rice. For e.g. if you have approximately one heaped tablespoon of dried tempeh, you will need three heaped tablespoons of white rice. You can just eyeball the quantity; you don’t have to be exact.
5. Heat a pan and gently dry roast the white rice over low-medium heat until it turns light golden. Let it cool down to room temperature.
6. Using the smallest jar of your mixer grinder set, grind the dried tempeh + roasted rice into a fine powder. Do it in short bursts with a few seconds’ intervals in between to prevent overheating.
7. Sift the powder using a fine mesh sieve and store in an airtight glass bottle. Keep refrigerated. It will stay good for a few months.
How to Use this Homemade Tempeh Starter Culture?
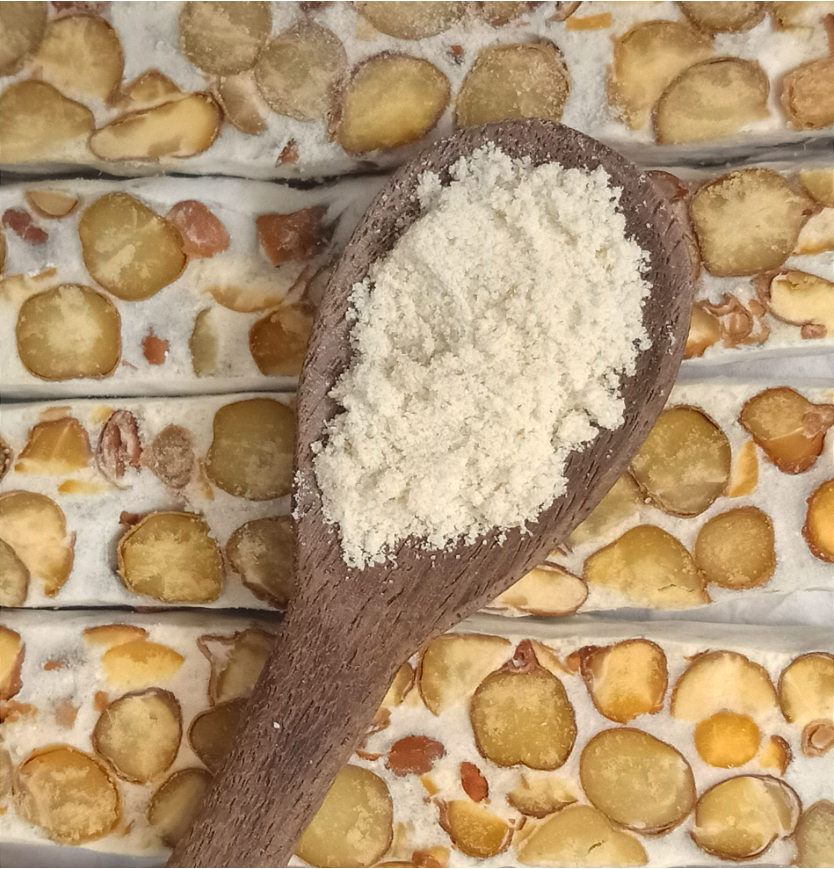
When using a commercial tempeh starter culture, I dilute it with a little besan or rice flour to ensure uniform coating of all the beans. Since this homemade tempeh starter culture is already mixed with rice flour, we can use it as it is. Use one heaped teaspoon of this powder per one cup of uncooked, dry beans.
Precautions
* The appearance of greyish and black spores is a perfectly normal sign of spore maturation. However, the presence of any orange, blue, green, or pink mold is a sign of contamination.
* While the over-mature tempeh may have a stronger “mushroomy” smell, it should not smell sour, rotten, or “disgusting.”
* The presence of any form of slime or stickiness is also a sign of contamination.
* Do NOT roast the dried tempeh. Only the white rice is to be roasted.
* Use only homemade soy tempeh to make this starter. Do NOT use any chickpea/rajma/lentil tempeh for this.
* It is better to make this starter in the hot summer months rather than in wintertime.
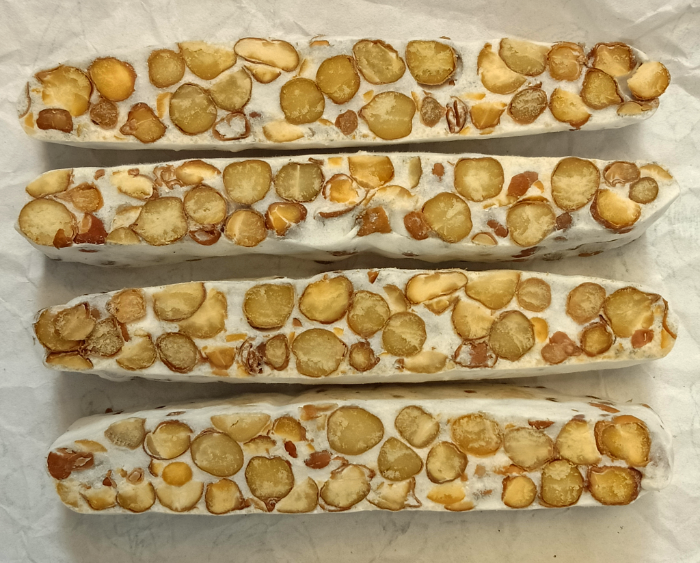
Image: Black chickpea tempeh (cross-section) grown with this homemade starter culture powder
Also see:
Homemade Tempeh: Tips for Beginners
How to Know if My Homemade Tempeh is Ready?
11 Varieties of Soy & Non-Soy Tempeh to Make at Home
11 Exciting Ideas to Use Tempeh in Indian Cuisine
Thanks Namrata for such a detailed and lucid writeup.
The tempeh made using your home grown starter looks so inviting.
Would surely love to try making my own starter someday soon😀
Thank you Uma 🙂 it’s super easy, do try! You won’t want to or need to use store bought starter ever again.
[…] How to Make Homemade Tempeh Starter? […]
[…] How to Make Homemade Tempeh Starter? […]
[…] How to Make Homemade Tempeh Starter? […]
[…] How to Make Homemade Tempeh Starter? […]
[…] How to Make Homemade Tempeh Starter? […]
[…] How to Make Homemade Tempeh Starter? […]